How to adjust the height of your nocking points?
In this workshop, we are diving back into a key aspect of bow adjustment: the height of the nocking point, often referred to as "setting porpoising".
With the tiller set and the string properly in place, the next step is figuring out where to position the nocking point.
So, what exactly is "porpoising"?
Porpoising happens when the arrow bobs up and down along its flight path, similar to how a porpoise moves through water. This rising and diving motion means the nocking point likely needs adjusting. If your arrow is behaving like this, it’s time to fine-tune that nocking point.
You have to set the height difference between the nocking point and the arrow rest. It's measured in millimeters and needs to be set as accurately as possible to prevent the arrow from oscillating vertically when released. This helps improve grouping and accuracy. Typically, value falls between +3mm and +10mm.
How do you set the nocking point?
To set your nocking point, you'll need to run a few tests:
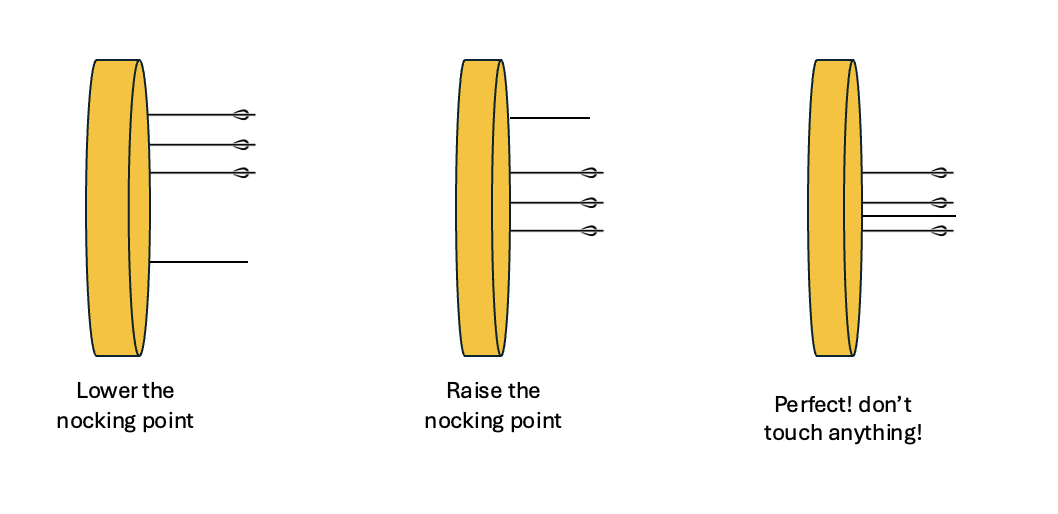
Initial Setup: Start with a preliminary nocking point at about +5mm. Use a temporary marker, like a piece of wire, that you can easily adjust up or down.
Testing: For beginners, stand about 20 meters away; experienced archers can opt for 30 meters. Shoot several feathered arrows along with one or two featherless arrows.

Observing Results:
1 /If featherless arrows land above the feathered ones, raise your nocking point.
2 / If they land below, lower it.
Repeat: Continue adjusting and shooting until all arrows hit at the same height.
Once they do, you've found the correct nocking point. Now, secure it properly, and you're all set!
